Surface finish quality is one of the most technically significant differences between 3D printed wax patterns and hand-injected wax models in jewelry casting. The surface condition of the wax pattern transfers directly to the investment mold and subsequently to the cast metal surface, which in turn affects the amount of finishing labor required before a piece is ready for sale. For jewelry workshops, the surface finish of wax patterns is not merely an aesthetic concern—it is a production cost factor that influences labor hours, material waste, and overall profitability. This article provides a detailed technical comparison of surface finish quality between 3D printed and hand-injected wax patterns, examining the causes of surface differences, their effects on casting, and the post-processing requirements for each method.
Hand-injected wax patterns, produced using a vacuum wax injector, are characterized by a smooth, glossy surface that closely replicates the interior surface of the mold. The surface quality of an injected pattern is determined primarily by the mold surface and the wax formulation rather than by the injection process itself.
Rubber molds produced from a polished master pattern yield wax patterns with surface roughness values typically in the range of 0.5 to 2 microns Ra (arithmetic average roughness). Metal molds machined and polished to a mirror finish can produce wax patterns with surface roughness below 0.5 microns Ra. This level of smoothness translates directly to the cast metal surface, which requires minimal post-cast finishing—often limited to light tumbling, brief polishing, and final inspection.
The uniformity of injected wax surfaces is another important characteristic. Because the wax fills the mold as a liquid under pressure and vacuum, the surface is continuous and free of directional artifacts. There are no layer lines, pixel boundaries, or build artifacts. The only surface discontinuities are the parting line where the mold halves meet and the injection point where wax enters the cavity. Both of these are predictable, well-understood features that can be minimized through proper mold design and are easily addressed during standard finishing.
The surface finish of injected wax is also consistent across the entire pattern. Complex geometries, curved surfaces, and detailed areas all exhibit the same surface quality because the liquid wax conforms uniformly to the mold interior. This consistency is a significant advantage for production jewelry where every cast piece must meet the same surface standard.
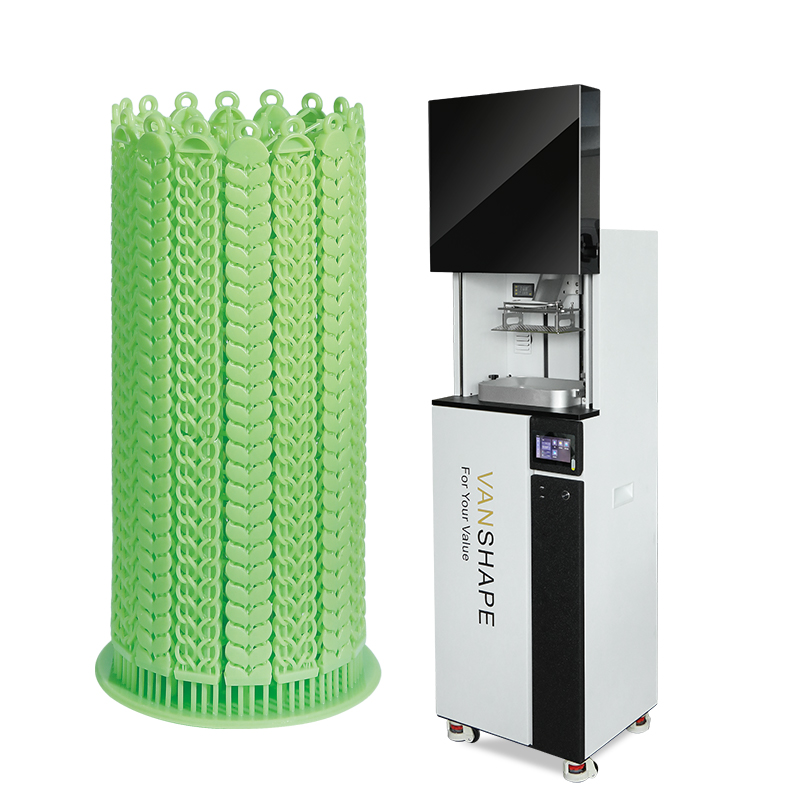
3D printed wax patterns, produced on a 3d jewelry printer, exhibit fundamentally different surface characteristics due to the layer-by-layer additive manufacturing process. The surface of a 3D printed pattern is composed of discrete layers, each representing a cross-section of the CAD model at a specific Z-axis height. This layering creates surface artifacts that do not exist in injected wax.
The most prominent surface artifact is the stair-step effect. On curved or angled surfaces, each printed layer creates a small visible step corresponding to the layer thickness. At a layer height of 25 microns—a common setting for jewelry printing—a surface angled at 45 degrees exhibits steps approximately 25 microns high and 25 microns wide. On vertical surfaces, layer lines appear as horizontal striations with a periodicity equal to the layer height. On horizontal surfaces facing the build platform, the pixel grid of the projector or light engine may create a subtle texture corresponding to the XY resolution of the printer.
The measured surface roughness of 3D printed wax patterns depends on the surface orientation relative to the build direction. Vertical and near-vertical surfaces typically exhibit roughness values of 3 to 12 microns Ra due to layer lines. Horizontal upward-facing surfaces may achieve roughness of 1 to 4 microns Ra, approaching the quality of injected wax. Angled surfaces fall between these extremes, with roughness proportional to the angle relative to the build platform.
Surface quality is also affected by the printing technology. Digital Light Processing (DLP) printers use a pixelated light engine, which creates a pixel grid texture on surfaces parallel to the build platform. Stereolithography (SLA) printers use a laser spot, which produces a smoother surface on horizontal planes but may exhibit different artifacts on curved surfaces due to the scanning pattern. MultiJet wax printers, which deposit actual wax rather than photopolymer resin, can achieve smoother surfaces but at significantly higher equipment cost.
The layer lines on 3D printed wax patterns transfer to the investment mold during the investing process and subsequently to the cast metal surface. The investment slurry replicates the wax surface with high fidelity, capturing even sub-micron features. During burnout, the wax or resin is eliminated, but the surface detail remains in the investment. When molten metal is introduced, it fills the mold and replicates the investment surface, including all artifacts from the original wax pattern.
This means that layer lines on a 3D printed wax pattern become visible striations on the cast metal surface. At 25 micron layer height, these striations are visible to the naked eye on curved surfaces and can be felt with a fingernail or a cotton wisp—the standard tactile test used by jewelers to evaluate surface quality. On pieces with large curved surfaces such as ring shanks or domed pendants, the layer lines create a corrugated appearance that must be removed through filing, sanding, and polishing before the piece meets commercial standards.
The depth of the transferred layer lines depends on the orientation of the surface relative to the build direction. Surfaces perpendicular to the build direction (horizontal surfaces) show minimal layer artifacts because each layer is a continuous flat plane. Surfaces parallel to the build direction (vertical surfaces) show the most pronounced layering because the full height of each layer is exposed as a step on the surface. Angled surfaces show intermediate artifact depth.
Reducing layer height is the most direct method of minimizing layer lines. Printing at 15 or 10 micron layer height reduces the step height proportionally, producing a surface that requires less post-cast finishing. However, reducing layer height increases print time proportionally—a 15 micron print takes approximately 1.7 times longer than a 25 micron print of the same geometry. Workshops must balance the time cost of finer printing against the labor savings in post-cast finishing.
Injected wax patterns require minimal post-processing before investing. After removal from the mold, the pattern is inspected for defects such as flash at the parting line, short shots, or wax bubbles. Parting line flash is trimmed with a scalpel, and the injection point is cut flush with the surface. Minor surface imperfections can be smoothed with a wax spatula warmed over an alcohol lamp. The entire post-processing operation typically takes 1 to 3 minutes per pattern and requires only basic hand tools.
Because injected wax surfaces are already smooth, no surface treatment is needed before investing. The pattern is cleaned with a lint-free cloth to remove dust and finger oils, then mounted directly on the sprue tree. The minimal post-processing requirement is one of the reasons injection remains preferred for high-volume production—the labor cost per pattern is very low once the mold exists.
3D printed patterns require more extensive post-processing. After printing, the pattern is removed from the build platform and washed in isopropyl alcohol to remove uncured resin. Support structures are carefully removed with cutters, and support attachment points are sanded or filed smooth. The pattern is post-cured under UV light to achieve full polymerization.
For surface finishing, several options are available depending on the required quality level:
Sanding: Fine-grit sandpaper (400 to 1200 grit) can be used to smooth layer lines on accessible surfaces. This is labor-intensive and risks distorting fine details if not performed carefully. Sanding is most practical for large flat or gently curved surfaces.
Solvent vapor smoothing: Brief exposure to solvent vapor can slightly melt the surface, reducing layer line visibility. This technique is material-dependent and requires careful control to avoid over-smoothing and loss of detail. Not all castable resins are compatible with solvent vapor treatment.
Dipping: Coating the printed pattern in a thin layer of wax can fill layer lines and create a smoother surface. This technique adds a step but can significantly improve surface quality. The coating wax must be compatible with the burnout schedule.
Print orientation optimization: Orienting the pattern on the build platform to minimize layer lines on critical surfaces is the most effective preventive measure. Flat surfaces should be oriented horizontally, and curved surfaces should be positioned to minimize the angle relative to the build platform.
The post-processing time for 3D printed patterns ranges from 5 to 30 minutes per pattern depending on complexity and the required surface standard. This labor must be factored into the cost comparison with injection, particularly for small production runs where per-piece labor has a significant impact on total cost.
The surface finish difference between 3D printed and injected wax patterns has practical implications for how workshops structure their production:
For pieces where surface finish is the primary quality criterion—such as plain wedding bands, signet rings with polished shanks, and smooth domed pendants—injected wax remains the superior choice. The smooth surface transfers to the cast metal with minimal finishing required, reducing the time spent on jewelry polishing machine operations and manual filing. The cost of mold creation is justified by the labor savings across the production run.
For pieces with extensive surface detail—such as engraved patterns, textured finishes, filigree, and designs where the surface is intentionally non-smooth—the layer lines of 3D printed patterns are less consequential. The design detail itself becomes the dominant surface feature, and layer lines are obscured by the intended texture. In these cases, 3D printing offers both faster production and acceptable surface quality without the need for mold-making.
For prototypes and one-off custom pieces, the surface finish of 3D printed patterns is generally acceptable because the cast prototype will be hand-finished regardless. The additional finishing time for layer line removal is a small fraction of the total custom jewelry production time and is offset by the elimination of mold-making.
Workshops should also consider the effect of print resolution on surface quality when selecting a 3D printer. Printers capable of 10 to 15 micron layer heights produce noticeably smoother surfaces than those limited to 25 or 50 micron layers. The investment in a higher-resolution printer may be justified if the workshop frequently produces pieces with large smooth surfaces where layer lines would be visible.
Hand-injected wax models produce surfaces that are smoother, more uniform, and require less post-processing than 3D printed wax patterns. The layer-by-layer nature of additive manufacturing introduces surface artifacts that transfer to the cast metal and require additional finishing labor. However, 3D printing offers advantages in design flexibility, prototyping speed, and cost for small batches that often outweigh the surface finish penalty. Workshops should evaluate the surface requirements of each piece, the production volume, and the available finishing capacity when choosing between the two methods. For many operations, maintaining both capabilities and routing each job to the appropriate process produces the best balance of quality, speed, and cost.
To explore equipment options for your wax pattern production, visit Yihui Casting to learn more about available 3d jewelry printer systems and injection equipment for professional jewelry manufacturing.
 online service
Scan to wechat :