Jewelry prototyping is the phase where designs are tested, refined, and validated before committing to production. The method used to create prototype wax patterns affects how quickly a design can be iterated, how much each revision costs, and how complex the final piece can be. Two tools dominate this stage: the 3d jewelry printer and the vacuum wax injector. While both produce wax patterns suitable for lost wax casting, they serve fundamentally different roles in the prototyping workflow. Understanding when to use each tool allows jewelry workshops to reduce development time, control costs, and produce better final designs.
Jewelry prototyping presents a unique set of constraints. Designs must be tested not only for visual appearance but also for structural integrity, wearability, castability, and stone-setting feasibility. A prototype that looks correct on screen may reveal problems only when cast in metal—prongs may be too thin, gallery work may trap investment, or the piece may feel unbalanced when worn. This means that prototyping often requires multiple iterations, with each revision involving a new wax pattern.
The traditional approach to prototyping involves creating a master pattern by hand carving or CNC machining, producing a rubber mold, and injecting wax copies. Each design change requires producing a new master and a new mold. This process is time-consuming and expensive, particularly during the early stages of design when revisions are frequent. The alternative—3D printing—eliminates the mold step entirely, allowing each revision to be printed directly from an updated CAD file.
However, this does not mean that 3D printing is always the better choice for prototyping. There are specific scenarios where a vacuum wax injector remains the appropriate tool, even during the prototype phase. The decision depends on turnaround time requirements, iteration frequency, design complexity, and the stage of development.
For initial prototyping, turnaround time is the primary consideration. When a client approves a design concept, the workshop must produce a physical wax pattern as quickly as possible to validate the design and move to casting. In this scenario, 3D printing is almost always faster than injection.
The 3D printing workflow for a first prototype is straightforward: the CAD model is finalized, the file is sent to the printer, and the pattern is built in 2 to 6 hours depending on complexity and resolution settings. After a brief post-processing period—washing, support removal, and UV curing—the pattern is ready for investing. The entire process from digital file to investment-ready pattern can be completed in a single working day.
The injection workflow for a first prototype is significantly longer. Before any wax pattern can be injected, a mold must exist. Creating a rubber mold requires a master pattern, which must be produced by hand, CNC, or 3D printing. The rubber is vulcanized around the master for 1 to 2 hours, then cooled, opened, and cut with parting lines. Test injections are needed to verify that the mold fills correctly and the pattern releases cleanly. This process typically takes 1 to 3 days, depending on mold complexity and the skill of the mold maker.
For a workshop producing custom jewelry with client-imposed deadlines, the ability to produce a castable prototype within hours rather than days is a decisive advantage. It allows the workshop to cast a metal prototype, present it to the client, and incorporate feedback into the next iteration without losing days to mold-making.
Prototyping rarely produces a final design on the first attempt. A typical custom jewelry project may require 2 to 5 design iterations before the client approves the final piece. Each iteration involves modifying the design and producing a new wax pattern for evaluation.
With 3D printing, each iteration costs only the material and machine time for a single print. A castable resin pattern typically costs $2 to $8 in material depending on size and resin type. The CAD model is modified, the file is resent to the printer, and a new pattern is produced within hours. There is no additional labor beyond the design work itself, and no consumable costs beyond resin and solvent.
With wax injection, each iteration requires a new mold. Even if the master pattern is 3D printed, the rubber mold must be remade for each design revision because the mold is a physical negative of the previous design version. A rubber mold costs $50 to $200 in materials and labor per iteration. For a project requiring 5 iterations, mold costs alone can reach $250 to $1,000 before any metal is cast.
The cost difference becomes more pronounced when considering the labor involved. Cutting a rubber mold is a skilled task requiring 1 to 3 hours of an experienced mold maker's time. At typical labor rates, this adds $30 to $120 per iteration in labor alone. Over multiple iterations, the time and cost savings of 3D printing are substantial.
This is not to say that injection has no role in prototyping. Once a design is finalized and approved, creating a mold for injection is the logical next step if the design will be produced in quantity. The mold-making cost is justified when amortized across a production run. The key distinction is that injection is a production tool, while 3D printing is a development tool.
Beyond speed and cost, 3D printing enables design complexity that is difficult or impossible to achieve with injection. This is particularly relevant for contemporary jewelry designs that incorporate organic forms, lattice structures, and internal features.
Wax injection is fundamentally limited by mold mechanics. The mold must open and close along parting lines, and the wax must flow into all cavities before solidifying. Undercuts, internal channels, and complex lattice work require multi-part molds or inserts, which increase mold complexity and cost. Some geometries—such as fully enclosed cavities or interlocking components—cannot be injection molded at all because there is no way to extract the pattern from the mold.
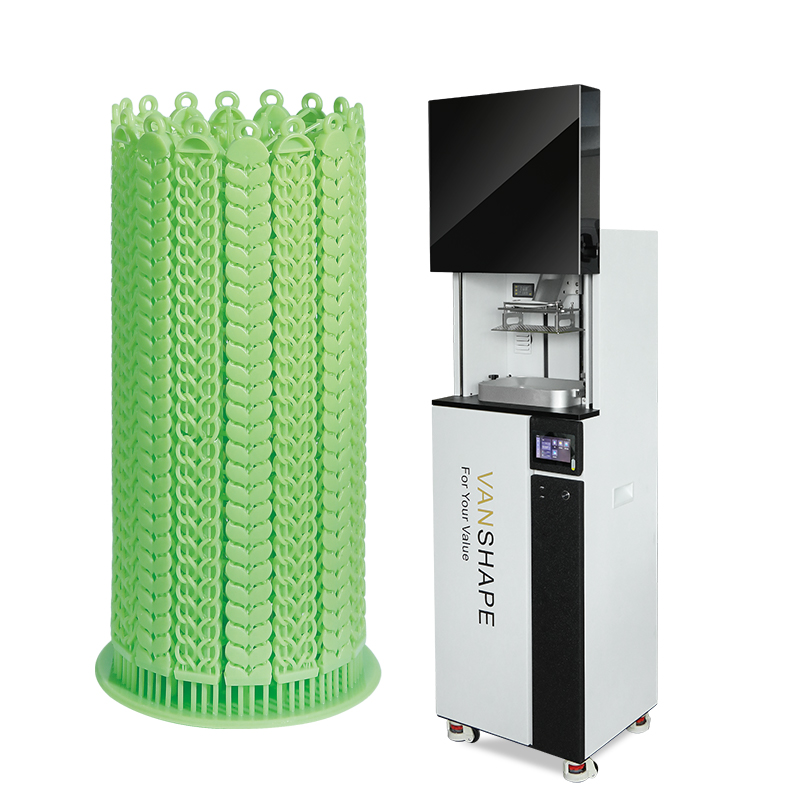
A 3D jewelry printer faces no such geometric constraints. Because the pattern is built additively layer by layer, any geometry that can be modeled in CAD can be printed. Internal channels for chain passage, undercut gallery work, and complex filigree patterns that would require impossible mold configurations can be produced directly. Support material fills voids during printing and is removed afterward, allowing geometries that would be unmoldable.
For prototyping designs that push the boundaries of traditional jewelry manufacturing, 3D printing is not merely faster—it is often the only viable method. Workshops specializing in avant-garde or highly customized designs should consider 3D printing an essential prototyping tool regardless of production volume.
It is worth noting that complex 3D printed patterns may require more post-processing than simple designs. Support removal from intricate geometry requires care, and small features may be fragile during handling. However, these challenges are manageable with proper technique and do not negate the geometric freedom that additive manufacturing provides.
Despite the advantages of 3D printing for early-stage prototyping, there are specific scenarios where a vacuum wax injector is the appropriate tool even during the prototype phase:
Material validation: When the prototype must be produced in a specific injection wax to evaluate how that wax performs in burnout. Castable resins and injection waxes have different burnout characteristics, and some foundries prefer to validate designs using the same wax that will be used in production.
Surface finish evaluation: Injection wax patterns have a smoother surface than 3D printed patterns, which may affect the appearance of the cast prototype. If the prototype is being produced for a client presentation where surface quality is critical, injection may be preferred.
Production simulation: When prototyping is focused on validating the production process rather than the design itself. Testing injection parameters, mold flow, and cycle times requires using the injector with a production-representative mold.
Existing mold availability: If a suitable mold already exists from a previous project or a similar design, injecting a pattern is faster than printing one. This applies to design modifications that use an existing mold as a starting point.
In practice, most professional workshops use both tools during prototyping. The 3D printer handles early iterations and complex geometry, while the wax injector is brought in once the design is finalized and production simulation is needed. This hybrid approach maximizes the strengths of both technologies.
To determine which tool to use for a given prototyping task, workshop managers should evaluate the following factors:
Iteration number: If the design is in its first or second revision, use 3D printing. If the design is finalized and the prototype is for production validation, consider injection.
Design complexity: Designs with undercuts, internal features, or complex lattice work should be 3D printed. Simple geometries that are easily molded can be either printed or injected.
Timeline: If the client expects a prototype within 24 hours, 3D printing is the only viable option. If the timeline allows 2 to 3 days, injection from an existing or quickly produced mold is feasible.
Production intent: If the design will eventually be produced in quantity, create the mold during prototyping to validate both the design and the mold simultaneously. If the design is a one-off custom piece, there may be no need for a mold at all.
Budget: For projects with tight development budgets, 3D printing minimizes per-iteration cost. For projects where mold cost is justified by production volume, investing in the mold during prototyping is economically sound.
The decision to use a 3D jewelry printer or a wax injector for prototyping depends on the stage of development, the complexity of the design, and the production intent of the project. For early-stage design iterations, custom one-off pieces, and complex geometries, 3D printing offers faster turnaround, lower per-iteration cost, and greater design freedom. For production validation, surface finish evaluation, and designs destined for volume production, wax injection from a physical mold remains the appropriate choice. Most workshops benefit from maintaining both capabilities and routing each prototyping task to the tool that best matches its requirements.
If your workshop is evaluating equipment for prototyping and production, Yihui Casting offers both 3d jewelry printer systems and vacuum wax injector equipment designed for professional jewelry manufacturing. Contact Yihui Casting to discuss your prototyping workflow and find the right equipment configuration for your needs.
 online service
Scan to wechat :